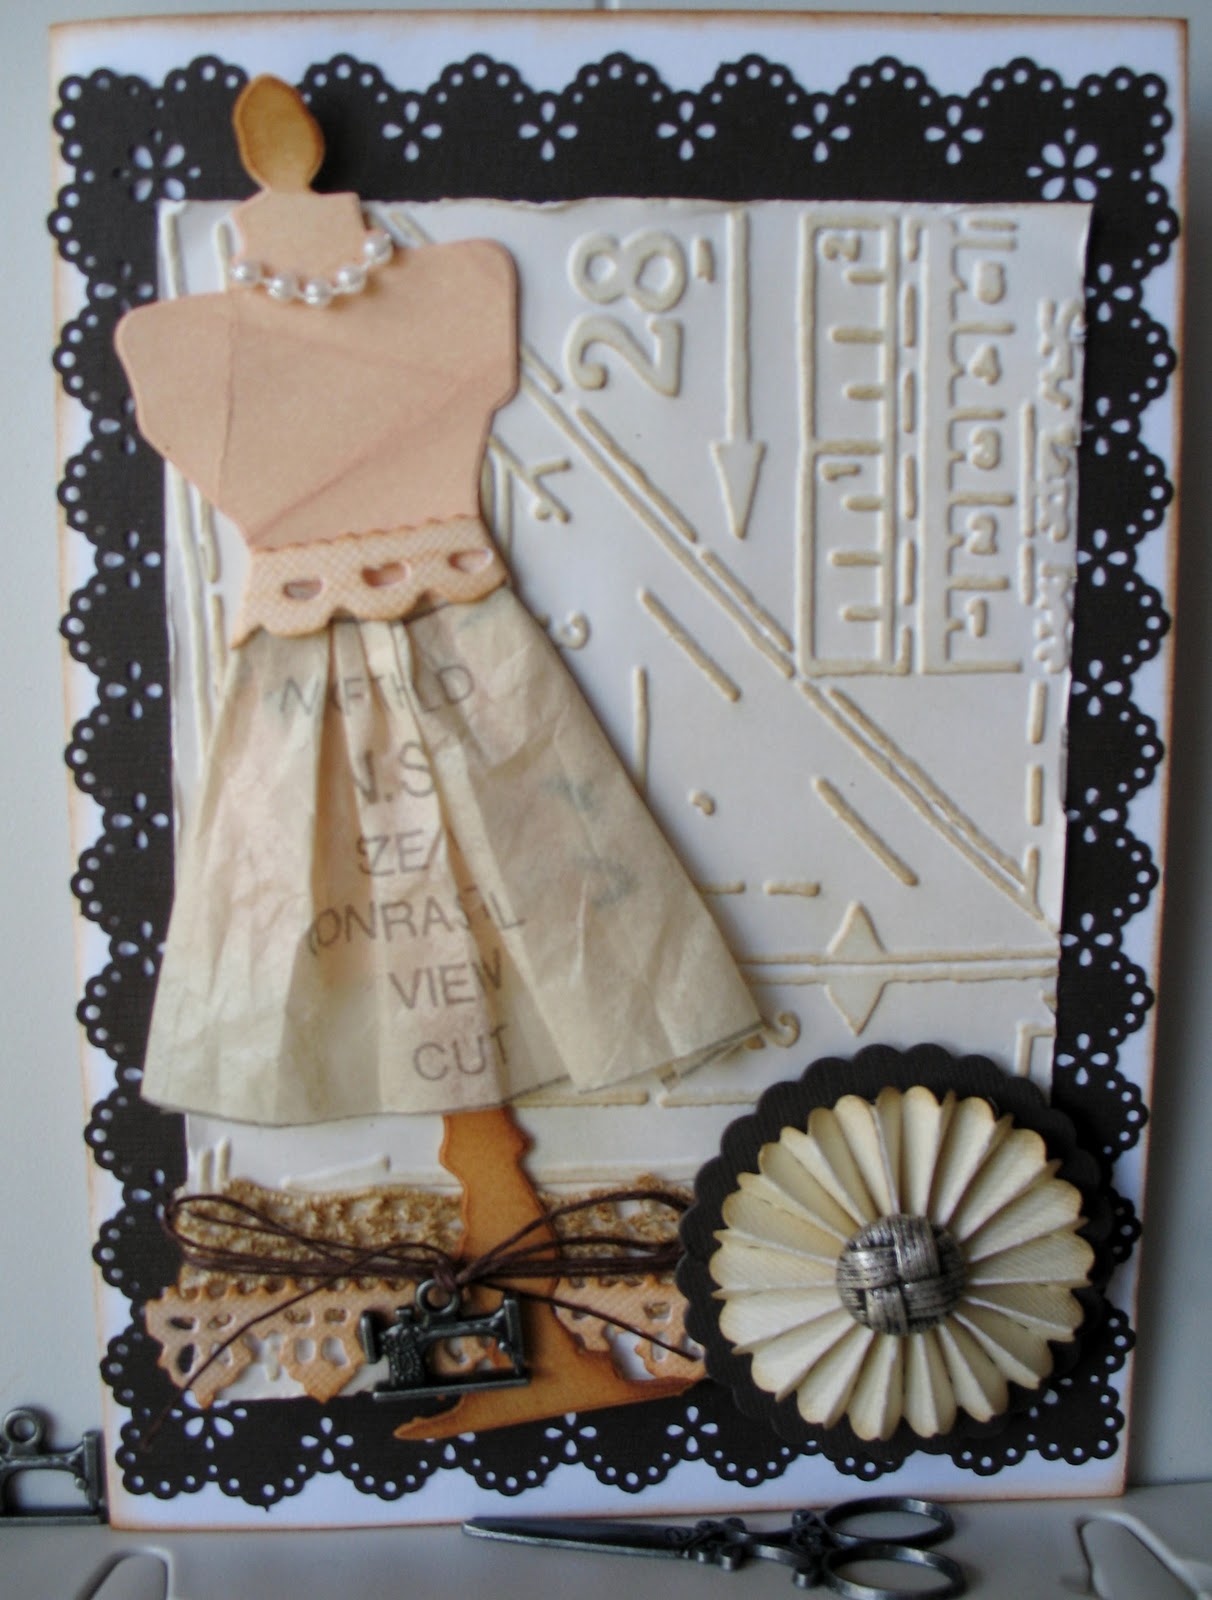
Oh my goodness - how quick are these to put together?? Managed this one in less than an hour because I have had to sort out a couple of things since 8am and still have managed to produce this by 9.10!
Have seen the technique of inking a piece of felt a few times but have never tried it before - now I am addicted! This will be appearing a lot in my artwork from now on - believe me! I was a bit worried to start as I only have three distress reinkers - Rusty Hinge, Wethered Wood and Wild Honey - not really Christmassy colours are they! I also thought they might clash but no they look great!
Have used a Crafty Individuals stamp inked in the above colours, to keep it matching I have inked the tag with Wild Honey and then the edges with Rusty Hinge and then covered it with the lovely Dyan's (Blonde Moments) Festive Candy Lustre Pearl Pigment. Admittedly the lampost was already cut out and inked so I just had to add the snow (with SnowWriter and glitter) and put on the holly leaves and finish with bling. The snowman was also already cut - a left over from my advent calendar (for which I have had a personal email off T!m saying how much he liked it - whoo hooo can't get higher praise than that for a configuration box can you!!!), I just had to colour him in with promarkers and finish with bling and a pom pom (gotta be done hasn't it!). Then I have just finished it off simply with a piece of calico inked with Vintage Photo and another Fairy (and yes it is another fairy as I bought 10 of them so they will be appearing on a few more tags yet - I haven't just pinched it off day 1 - honest!).
Well that's it for me at the moment am off to take DS1 to tennis, then the school Christmas Fayre then back for his Xbox party and sleepover and then prepare for our family birthday party tomorrow - gosh it's all go - thank goodness for a quick technique! If you want to join in with the fun then pop over to T!ms.
Thanks for looking :) Mojo's on fire from Solihull
edited to add I have since done loads more of these! four more are displayed on the post above.
Saturday, 3 December 2011
Friday, 2 December 2011
12 Tags of Christmas - Day 2
Whoo hoo - two posts in one day! that doesn't happen very often does it! Well if you are following along with T!ms 12 tags (and if not - why not??) then this is my take on today's:
As you can see I have kept mine nice and simple and basically copied T!ms by following his techniques.
I have used Kraft resist cardstock (not got the Seasonal one!), covered it with Picket Fence distress stain (so love this stuff!) and carried out the technique as described, inked the edges with Festive Berries and then, when distressed with my trustly old knife blade, with Vintage Photo. I also sprayed the tag with Heirloom Gold Perfect Pearl Mist (both the Vintage Photo distress ink and the Perfect Pearl Mist were given to me by T!m at ArtsyCrafts earlier this year so I had to use them!). I don't own the Reindeer die but this was cut out for me by Jackie at a crop a few months ago (thanks Jackie!).
I used the On the Edge Ornate die on grunge paper and painted it with the mouldy red inka paint that was sitting on my desk (as you do! and no I still haven't emailed them yet.....). I tied a Lets Grow rope string around his neck with a yellow heart hanging off it (from Hobbycraft and the Works respectively) and then added a bling eye and a red pom pom to turn him into Rudolph.
I am not sure who manufactured the stamped circle but it is inked with Evergreen berries, mounted onto a sizzix pinking edge circle inked with Iced Spruce and then covered with glossy accents (which is still wet!), the holly is from T!ms Festive Greenery die and the 3 berries were added with my Bejeweller. I finished the tag with some earthy pastel and earthy hemp from which I have hung three pearls off a necklace from Primark and I think the Hope tag was given to me at a class sometime ago and never used!
Whole tag only took an hour which is very quick for me and I have also had a lovely morning at my art class learning (finally!) how to use water colour pencils - will post about that at a later time.
Thanks for looking - Inky from Solihull
As you can see I have kept mine nice and simple and basically copied T!ms by following his techniques.
I have used Kraft resist cardstock (not got the Seasonal one!), covered it with Picket Fence distress stain (so love this stuff!) and carried out the technique as described, inked the edges with Festive Berries and then, when distressed with my trustly old knife blade, with Vintage Photo. I also sprayed the tag with Heirloom Gold Perfect Pearl Mist (both the Vintage Photo distress ink and the Perfect Pearl Mist were given to me by T!m at ArtsyCrafts earlier this year so I had to use them!). I don't own the Reindeer die but this was cut out for me by Jackie at a crop a few months ago (thanks Jackie!).
I used the On the Edge Ornate die on grunge paper and painted it with the mouldy red inka paint that was sitting on my desk (as you do! and no I still haven't emailed them yet.....). I tied a Lets Grow rope string around his neck with a yellow heart hanging off it (from Hobbycraft and the Works respectively) and then added a bling eye and a red pom pom to turn him into Rudolph.
I am not sure who manufactured the stamped circle but it is inked with Evergreen berries, mounted onto a sizzix pinking edge circle inked with Iced Spruce and then covered with glossy accents (which is still wet!), the holly is from T!ms Festive Greenery die and the 3 berries were added with my Bejeweller. I finished the tag with some earthy pastel and earthy hemp from which I have hung three pearls off a necklace from Primark and I think the Hope tag was given to me at a class sometime ago and never used!
Whole tag only took an hour which is very quick for me and I have also had a lovely morning at my art class learning (finally!) how to use water colour pencils - will post about that at a later time.
Thanks for looking - Inky from Solihull
12 Tags of Christmas - Day 1
I ummed and arred yesterday about making this tag - Morag and I looked and cooed over it yesterday morning and it took us about half an hour to cave in and order the pinecone die online between us (we sat and tried the Marianne rose die wrapped around a cocktail stick but despite the fact that it did look a bit like a pinecone it wasn't good enough for us so we had to treat ourselves!!), so I was going to wait until the new die arrived until I did the tag but then inspiration struck last night and I got on with it using stamps instead (this was after I had walked home from school frantically looking for some small pinecones but alas there aren't any on Widney Lane!) - in fact I sat down with both children to try and get them to join in and make a tag each too but after two mishaps with the embossing powder (I used the wrong ink) they were off to watch cartoons!
Anyway here is my tag (had to finish it this morning due to using crackle glaze!):
Used kraft cardstock for the tag and label, T!ms Christmas embossing folder and white embossing powder, Gathered Twigs, Festive Berries, Evergreen Bough and Iced Spruce distress inks, the Festive Greenery sizzix die, some scalloped lace inked with Evergreen Bough, one of T!ms Vintage Laces to edge the greeting, the greeting is an Anita's clear stamp (see Morag and I were very restrained not giving in and buying the NOEL die too although can I just say that it will be brilliant if T!m decides to use the Reindeer mover and shakers die one day too! wink, wink). The string of pearls I picked up at a local haberdashery and the fairy I bought at Hobbycrafts at the NEC back in March. The pinecones are a stamp (not sure what make) which I have coloured with Gathered Twigs and Evergreen Bough inks and then crackle glaze and then have mounted on using two heights of 3D foam so that they are 3D. The red and green twines are by Creative Expressions.
Really enjoyed making this so can't wait for the next one! Children loved opening the advent calendar yesterday (I have filled it with chocolate and some mini figures) but it still didn't compete with the Lego Star Wars one - in fact little one is up already this morning desperate to open it as it is his turn on even numbered days for the lego one!
Also can I just say a big hello to JB - thanks for following me :)
Thanks for looking - Pineconeless from Solihull.
Anyway here is my tag (had to finish it this morning due to using crackle glaze!):
Used kraft cardstock for the tag and label, T!ms Christmas embossing folder and white embossing powder, Gathered Twigs, Festive Berries, Evergreen Bough and Iced Spruce distress inks, the Festive Greenery sizzix die, some scalloped lace inked with Evergreen Bough, one of T!ms Vintage Laces to edge the greeting, the greeting is an Anita's clear stamp (see Morag and I were very restrained not giving in and buying the NOEL die too although can I just say that it will be brilliant if T!m decides to use the Reindeer mover and shakers die one day too! wink, wink). The string of pearls I picked up at a local haberdashery and the fairy I bought at Hobbycrafts at the NEC back in March. The pinecones are a stamp (not sure what make) which I have coloured with Gathered Twigs and Evergreen Bough inks and then crackle glaze and then have mounted on using two heights of 3D foam so that they are 3D. The red and green twines are by Creative Expressions.
Really enjoyed making this so can't wait for the next one! Children loved opening the advent calendar yesterday (I have filled it with chocolate and some mini figures) but it still didn't compete with the Lego Star Wars one - in fact little one is up already this morning desperate to open it as it is his turn on even numbered days for the lego one!
Also can I just say a big hello to JB - thanks for following me :)
Thanks for looking - Pineconeless from Solihull.
Wednesday, 30 November 2011
WOYWW 130
Here we are again with yet another week gone! That means it's only one more week to DS1's birthday and 3 weeks (just over) to Christmas!
Here is my desk as of yesterday afternoon:
I had a little flurry of activity on Sunday and have finally started some Christmas cards! All very simple at the moment and everything I used was done last year and are leftovers in my Christmas box - very useful when you are busy! There are some new distress stains by my inks and some new stamps there on the left which I treated myself to from AFTH on black Friday (facing the wrong way sorry!) and the inka gold paint is there for me to make a decision about whether to email a complaint to them as its gone mouldy (went mouldy about 4 months ago but I keep forgetting about it) - other than that its all much of a muchness this week as I haven't had much time for crafting.
If you want to know why I am sharing my desk with the world then pop over to Julia's and join in the fun - be warned though it's very addictive and you will lose a few hours visiting other desks!
Thanks for looking - Worn out from Solihull
Here is my desk as of yesterday afternoon:
I had a little flurry of activity on Sunday and have finally started some Christmas cards! All very simple at the moment and everything I used was done last year and are leftovers in my Christmas box - very useful when you are busy! There are some new distress stains by my inks and some new stamps there on the left which I treated myself to from AFTH on black Friday (facing the wrong way sorry!) and the inka gold paint is there for me to make a decision about whether to email a complaint to them as its gone mouldy (went mouldy about 4 months ago but I keep forgetting about it) - other than that its all much of a muchness this week as I haven't had much time for crafting.
If you want to know why I am sharing my desk with the world then pop over to Julia's and join in the fun - be warned though it's very addictive and you will lose a few hours visiting other desks!
Thanks for looking - Worn out from Solihull
Friday, 25 November 2011
A new arrival
My DS1's headmaster's wife gave birth to a little boy on Monday - I already knew that they were expecting a boy so here is the card I made for them last week:
I havent got a baby boy stamp but I thought little Hamish with tractor would suffice and this card actually fits in with my challenge from last week (Time is the Tim tag which I will circle with 21st Nov as this was the date he was born, I - it's well inked!, M - two of bits of metal there and E - the handmade embellishment is this tag:
- as you can see the baby's name is William!).
I had also got out my knitting needles and made him this:
haven't ever knitted grey for a baby before but this wool was just so lovely and also Mr C (the headteacher) has a thing for wearing pink ties so I thought they would coordinate nicely! Didn't want to post the pictures earlier in the week as I have only gotten around to delivering them this morning!
Another exciting thing to happen this week is this:
yes its a first tooth! - finally! Sorry for the poor quality of the picture I have tried to fiddle with it in Windows Photo Gallery but its not as good as Photoshop and I havent had time for that yet! and just to prove that it was his tooth here is little envelope to the Tooth Fairy:
how cute is that!
Thanks for looking - Glad its Friday from Solihull!
I havent got a baby boy stamp but I thought little Hamish with tractor would suffice and this card actually fits in with my challenge from last week (Time is the Tim tag which I will circle with 21st Nov as this was the date he was born, I - it's well inked!, M - two of bits of metal there and E - the handmade embellishment is this tag:
- as you can see the baby's name is William!).
I had also got out my knitting needles and made him this:
haven't ever knitted grey for a baby before but this wool was just so lovely and also Mr C (the headteacher) has a thing for wearing pink ties so I thought they would coordinate nicely! Didn't want to post the pictures earlier in the week as I have only gotten around to delivering them this morning!
Another exciting thing to happen this week is this:
yes its a first tooth! - finally! Sorry for the poor quality of the picture I have tried to fiddle with it in Windows Photo Gallery but its not as good as Photoshop and I havent had time for that yet! and just to prove that it was his tooth here is little envelope to the Tooth Fairy:
how cute is that!
Thanks for looking - Glad its Friday from Solihull!
Wednesday, 23 November 2011
WOYWW 129
It seems strange posting this picture as I took it yesterday afternoon and what I am working on is actually now finished and on the blog post below! Oh well - at least the photo was taken in daylight and you get a gist of what I am/was doing:
today I will probably start my Christmas cards if I get time. This is actually a very tidy desk for me and its even tidier now that my advent calendar is already proudly on display in my lounge (there is a really big reason for that which I am very excited about!) although I do now need to fill it with goodies - might just go for the easy option of chocolate as lego mini figures would be a tad expensive!
If you want to join in the fun and have a lovely peek around the world of desks out there in big wide world then pop over to Julias and join in all the fun!
Thanks for looking and have a great week :)
today I will probably start my Christmas cards if I get time. This is actually a very tidy desk for me and its even tidier now that my advent calendar is already proudly on display in my lounge (there is a really big reason for that which I am very excited about!) although I do now need to fill it with goodies - might just go for the easy option of chocolate as lego mini figures would be a tad expensive!
If you want to join in the fun and have a lovely peek around the world of desks out there in big wide world then pop over to Julias and join in all the fun!
Thanks for looking and have a great week :)
Tuesday, 22 November 2011
You know when....
you get an idea and it just has to be done regardless of other things going on around you? Well I looked at Tim's blog last week and he had a link on there to thegentlemancrafter and I looked at the lovely robot on there and suddenly had the inspiration to use some of my configuration boxes into a snowman (how I got to a snowman from a robot I will never know - but get there I did) - so for the past 5 days whenever I have had a few spare minutes to sit in my craft room I been working on this:
this is the front of the advent - have made the brush from a paintbrush and raffia, the lantern is made from three of Tim's birdcages - honestly it was a lot trickier than it looks! the buttons and eyes are made from Tim's rosette dies and buttons (with stickles around the edges of the button rosettes), the mouth is made up from Tim's metal lock and spinners and the nose is an old metal disc with the word Wonderful on it. The scarf was some fabulous crocheted material given to me by Chris at my crop and the robins I caved in and bought.
So, where is the advent calendar? I hear you ask, well if you turn the whole thing around you get this:
The Snowmen are from a sizzix long die and coloured with promarkers, I have doodled around the edges to define them and added pom poms here and there and used bling for their eyes and buttons. The numbers are made from Tim's Upon a Time die and covered with glossy accents so they are nice and shiny. The other bits decorating the boxes are from Tim's Festive Greenery die with some bits finished off with pearls and bling. All the boxes, except the hat one, are painted white and inked with iced spruce - the hat is just painted black with one of Tim's Vintage Laces around the edge which is inked with Tea Dye.
Hope you like him! Now just need to go shopping and get all the bits and pieces to go in him!
Thanks for looking :) Oh and I won't be setting a fortnightly challenge today - sorry but too much going on at the moment! thanks for understanding.
this is the front of the advent - have made the brush from a paintbrush and raffia, the lantern is made from three of Tim's birdcages - honestly it was a lot trickier than it looks! the buttons and eyes are made from Tim's rosette dies and buttons (with stickles around the edges of the button rosettes), the mouth is made up from Tim's metal lock and spinners and the nose is an old metal disc with the word Wonderful on it. The scarf was some fabulous crocheted material given to me by Chris at my crop and the robins I caved in and bought.
So, where is the advent calendar? I hear you ask, well if you turn the whole thing around you get this:
The Snowmen are from a sizzix long die and coloured with promarkers, I have doodled around the edges to define them and added pom poms here and there and used bling for their eyes and buttons. The numbers are made from Tim's Upon a Time die and covered with glossy accents so they are nice and shiny. The other bits decorating the boxes are from Tim's Festive Greenery die with some bits finished off with pearls and bling. All the boxes, except the hat one, are painted white and inked with iced spruce - the hat is just painted black with one of Tim's Vintage Laces around the edge which is inked with Tea Dye.
Hope you like him! Now just need to go shopping and get all the bits and pieces to go in him!
Thanks for looking :) Oh and I won't be setting a fortnightly challenge today - sorry but too much going on at the moment! thanks for understanding.
Wednesday, 16 November 2011
Inspired!
Well so much for me putting out the papers on my desk this morning in order to spend some time this afternoon on a layout - I spent the morning look at 70 or so desks with WOYWW when I came across Tuire's blog and you see the little face with wings on the desk there? Well it inspired me to make this:
what a lovely way to spend an hour! Am really rather pleased with myself - now need to tidy up the table as DS2 has a friend over for tea - oh well it was great while it lasted!
Thanks for looking :)
what a lovely way to spend an hour! Am really rather pleased with myself - now need to tidy up the table as DS2 has a friend over for tea - oh well it was great while it lasted!
Thanks for looking :)
WOYWW 128
Morning everyone - here is my desk on this very cold and dark morning:
think I might go back to photographing my desk on an Tuesday afternoon next time! Promarkers are out as I have made a baby boy card to fit in with my fortnightly challenge - details here if you are interested in joining in!
Papers are out to hopefully inspire me to do another quick and simple layout - although these papers do all the work for you they are quite hard to use though - I am definately a sheet of plain cardstock and ink/paint it up girl at heart really! Other than that its much the same as normal with my other new seasonal inks there (yes I caved in and treated myself to both sets - decided that I actually use my inks more than anything else so as I had spare money left over from my trip to Hobbycrafts at the NEC I thought I would spend it wisely on something useful!). Have had a busy week mainly sewing and knitting and the only papercrafting I have done is the card you can just see peeking out on the right - will blog that when baby is born and I can complete the tag with the name!
If you would like to join in with the addictive Wednesday fun of showing your desk off to the world and then going and peeking at lots of others then pop over to Julias and join in the fun. Not sure how many desks I can get round to this week as my Nan is in hospital but I am hoping to catch up with a few of you.
Thanks for looking :)
think I might go back to photographing my desk on an Tuesday afternoon next time! Promarkers are out as I have made a baby boy card to fit in with my fortnightly challenge - details here if you are interested in joining in!
Papers are out to hopefully inspire me to do another quick and simple layout - although these papers do all the work for you they are quite hard to use though - I am definately a sheet of plain cardstock and ink/paint it up girl at heart really! Other than that its much the same as normal with my other new seasonal inks there (yes I caved in and treated myself to both sets - decided that I actually use my inks more than anything else so as I had spare money left over from my trip to Hobbycrafts at the NEC I thought I would spend it wisely on something useful!). Have had a busy week mainly sewing and knitting and the only papercrafting I have done is the card you can just see peeking out on the right - will blog that when baby is born and I can complete the tag with the name!
If you would like to join in with the addictive Wednesday fun of showing your desk off to the world and then going and peeking at lots of others then pop over to Julias and join in the fun. Not sure how many desks I can get round to this week as my Nan is in hospital but I am hoping to catch up with a few of you.
Thanks for looking :)
Sunday, 13 November 2011
Lots going on
I am still here but have actually been too busy crafting to stop and blog! Bought some lovely wool on Friday night from Hobbycraft so I am busy knitting a lovely grey baby cardigan for an imminent arrival at school, my quilt is coming on well so there will pictures of that soon too and then at my art class I learnt how to do a portrait:
Am really pleased with this as its my first attempt at drawing a face.
Thanks for looking :)
Am really pleased with this as its my first attempt at drawing a face.
Thanks for looking :)
Tuesday, 8 November 2011
Lets Think Creatively challenge no 9
It's Tuesday so,
My Grandma died 30 years ago today which has made me think about Time as it seems like just yesterday but also such a long time ago.
So the challenge this fortnight (I am going to back to my old style of complicated challenges - I find I am much more creative then than when I set a simple challenge) is TIME with each letter being used to give me the theme - so we need to make a layout, card and/or tag that includes some kind of reference to time (T) on it, must use Ink (I), include some Metal (M) and have a handmade embellishment (E) on it. If you fancy using an extra twist the item you create must be made in 30 minutes or less (bit difficult for me with the layout as they take me hours so I might skip that part then!).
I hope you will join in with me on my creative journey, if you do please leave me a link so I can come and have a look at your creations:
I have managed to get a quick tag done this morning to fit in with the last challenge (housework) - I wouldn't mind but I went to my weight watchers meeting (have lost 3lb! whoo hoo) and caught up with the housework so had some spare time so I got out the craft table and then got stuck despite having lots of ideas spinning around in my head! how annoying is that! Anyway yesterday I put together some backgrounds on some tags using my new Autumn inks (Gathered Twigs, Ripe Persimmon and Seedless Preserves) and then stamped on them using bleach (it was a housework challenge remember!), so I already had one of these to base my tag on (I used salt on the last one on the right rather than bleach):
excuse the darkness I took the picture in my lounge which is quite dark! and then I got out a couple of baskets in which I house a few bits of pieces of things I make but don't use immediately, bits of ribbon, die cuts, flowers - you get the picture! so I decided to use only items from these baskets and made this:
the two brown birds and leaves are Prima Resistant Canvas pieces, the rest were just already prepared and just needed a touch of ink to tie in with the tag.
Thanks for looking :)
My Grandma died 30 years ago today which has made me think about Time as it seems like just yesterday but also such a long time ago.
So the challenge this fortnight (I am going to back to my old style of complicated challenges - I find I am much more creative then than when I set a simple challenge) is TIME with each letter being used to give me the theme - so we need to make a layout, card and/or tag that includes some kind of reference to time (T) on it, must use Ink (I), include some Metal (M) and have a handmade embellishment (E) on it. If you fancy using an extra twist the item you create must be made in 30 minutes or less (bit difficult for me with the layout as they take me hours so I might skip that part then!).
I hope you will join in with me on my creative journey, if you do please leave me a link so I can come and have a look at your creations:
I have managed to get a quick tag done this morning to fit in with the last challenge (housework) - I wouldn't mind but I went to my weight watchers meeting (have lost 3lb! whoo hoo) and caught up with the housework so had some spare time so I got out the craft table and then got stuck despite having lots of ideas spinning around in my head! how annoying is that! Anyway yesterday I put together some backgrounds on some tags using my new Autumn inks (Gathered Twigs, Ripe Persimmon and Seedless Preserves) and then stamped on them using bleach (it was a housework challenge remember!), so I already had one of these to base my tag on (I used salt on the last one on the right rather than bleach):
excuse the darkness I took the picture in my lounge which is quite dark! and then I got out a couple of baskets in which I house a few bits of pieces of things I make but don't use immediately, bits of ribbon, die cuts, flowers - you get the picture! so I decided to use only items from these baskets and made this:
the two brown birds and leaves are Prima Resistant Canvas pieces, the rest were just already prepared and just needed a touch of ink to tie in with the tag.
Thanks for looking :)
Sunday, 6 November 2011
Busy Weekend
Spent the day yesterday (after DS1's tennis lesson) sorting out bedrooms and generally tidying up and clearing clutter, so today we are a little bit tidier and a little bit less cluttered! bin is full though! Have had a lovely day today catching up with my Mandy Shaw quilt and organising the bindings and background squares - involved lots of ironing (could use this for my challenge couldn't I!), lots of cutting and getting busy on my sewing machine. There is still a long way to go on the quilt but three of the applique squares are now completely finished and five just need a bit of tweeking - buttons and extra embroidery will all be done when the quilt is all put together - will be doing a bit more of this this week I think - it's been very relaxing!
Had a great day last Thursday at the NEC - bought a few bits and pieces but nothing major and actually came home with some pennies left over! A trip to Hobbycraft or Bramble Patch is on the cards I think!
Also did a fair bit of scrapping/crafting last week too - here I have two more items for my challenge, firstly the layout:
not much housework inspiration on there I hear you say but on the tag that is tucked away I crumpled and ironed it:
not very creative considering this is the same technique that I used on my tutorial but time wasn't really on my side last week!
Then I haven't managed to get a tag completed yet (still a day to go though!) but I have done these:
please excuse the background I don't know why I didn't put them on a sheet of paper first! but they are little envelopes for when my children lose a tooth, we find it easier to put the tooth in an envelope and then the fairy finds it no problem! These have again been crumpled, inked and ironed then I used some lovely Lavinia stamps and the two larger fairies are by Personal Impressions. Also on all of these I put a cobweb - see I knew I would be able to get dusting in there somewhere! And you see the little boy fairy on the first envelope well those little mushrooms either side of the big mushroom are actually my all time favourite stamp and I used to use it all the time - then I lost it! can you imagine the disappointment - I never caved in and bought another one as it was actually £4 for such a tiny stamp - anyway it was lost for over a year and then we moved study/DS2's bedroom around last week I found it! Right there under the desk (I blame OH for knocking it off and not noticing!) - so then I put it in a safe place in DS2's bedroom as now all my stamps are housed downstairs and when I went to get it to use it - it was gone again! Honestly talk about having a life of it's own! I didn't panic I just assumed I had moved it previously (as it was too high up for DS2 to interfere!), had it in my hand and then did another job (our work is never done is it!) and put it down somewhere - anyway yesterday I looked in a little basket full of some goodies I had put in to bring down to the craftroom (aka dining room) and it was in there! such a relief again - it is now in it's right place along with all my other Lavinia's.
Anyway enough of me waffling - I will finish here to give you all a breather! A big hello to Susan - thanks for following me - hope I haven't waffled too much!
Thanks for looking and don't forget that there is still time to join in with my challenge of using housework as your inspiration - details are here.
Bye and thanks for looking!
Had a great day last Thursday at the NEC - bought a few bits and pieces but nothing major and actually came home with some pennies left over! A trip to Hobbycraft or Bramble Patch is on the cards I think!
Also did a fair bit of scrapping/crafting last week too - here I have two more items for my challenge, firstly the layout:
not much housework inspiration on there I hear you say but on the tag that is tucked away I crumpled and ironed it:
not very creative considering this is the same technique that I used on my tutorial but time wasn't really on my side last week!
Then I haven't managed to get a tag completed yet (still a day to go though!) but I have done these:
please excuse the background I don't know why I didn't put them on a sheet of paper first! but they are little envelopes for when my children lose a tooth, we find it easier to put the tooth in an envelope and then the fairy finds it no problem! These have again been crumpled, inked and ironed then I used some lovely Lavinia stamps and the two larger fairies are by Personal Impressions. Also on all of these I put a cobweb - see I knew I would be able to get dusting in there somewhere! And you see the little boy fairy on the first envelope well those little mushrooms either side of the big mushroom are actually my all time favourite stamp and I used to use it all the time - then I lost it! can you imagine the disappointment - I never caved in and bought another one as it was actually £4 for such a tiny stamp - anyway it was lost for over a year and then we moved study/DS2's bedroom around last week I found it! Right there under the desk (I blame OH for knocking it off and not noticing!) - so then I put it in a safe place in DS2's bedroom as now all my stamps are housed downstairs and when I went to get it to use it - it was gone again! Honestly talk about having a life of it's own! I didn't panic I just assumed I had moved it previously (as it was too high up for DS2 to interfere!), had it in my hand and then did another job (our work is never done is it!) and put it down somewhere - anyway yesterday I looked in a little basket full of some goodies I had put in to bring down to the craftroom (aka dining room) and it was in there! such a relief again - it is now in it's right place along with all my other Lavinia's.
Anyway enough of me waffling - I will finish here to give you all a breather! A big hello to Susan - thanks for following me - hope I haven't waffled too much!
Thanks for looking and don't forget that there is still time to join in with my challenge of using housework as your inspiration - details are here.
Bye and thanks for looking!
Thursday, 3 November 2011
Sunday, 30 October 2011
Challenge Number 8 card
Here is a quick and simple card I have made for my Uncle (it's the closest I can get to a single layer card!):
Have decided it counts towards my challenge as I have dusted it with Heirloom Gold Perfect Pearls! hee hee. Also used Kraft card, music paper, T!m tag, Vintage photo dyed ribbon, Making Memories celebrations stamp, T!ms Artful Flight bird and birds nest. Distress Inks I used were Vintage Photo, Frayed Burlap, and Walnut Stain.
Thanks for looking :)
Have decided it counts towards my challenge as I have dusted it with Heirloom Gold Perfect Pearls! hee hee. Also used Kraft card, music paper, T!m tag, Vintage photo dyed ribbon, Making Memories celebrations stamp, T!ms Artful Flight bird and birds nest. Distress Inks I used were Vintage Photo, Frayed Burlap, and Walnut Stain.
Thanks for looking :)
Thursday, 27 October 2011
Away with the pixies!
Have completed the pixie layout that was on my desk on Wednesday:
Not really much to it as the gorgeous Prima Pixie Glen papers do it all for you really.
Here I used a sheet of "Garden Gate" with my photo mounted on two pieces of white cardstock, one inked with Bundled Sage and Vintage Photo and the other just edged with Vintage Photo. Then all I had to do was cut out a few elements from a sheet of "Psyke Cuts", ink over a Tattered Angels Ironworks Gate, stamp out the Lavinia Fairy Washing Line (see it in the bottom left hand corner there? it's my bestest, bestest stamp! so cute), then added some Shabby Chic Treasures (a bird, a birdhouse and a mushroom all lightly inked) and some prima flowers (Annalee Essentials 9 and Melody).
I finished off the birdhouse by placing it on some branches (from T!ms Autumn Gathering sizzix die) and some punched out and handcut leaves. Really pleased with the finished result even though it has got a pink background!
Also a big hello to Bridget - thank you for following me :)
Thanks for looking :)
Not really much to it as the gorgeous Prima Pixie Glen papers do it all for you really.
Here I used a sheet of "Garden Gate" with my photo mounted on two pieces of white cardstock, one inked with Bundled Sage and Vintage Photo and the other just edged with Vintage Photo. Then all I had to do was cut out a few elements from a sheet of "Psyke Cuts", ink over a Tattered Angels Ironworks Gate, stamp out the Lavinia Fairy Washing Line (see it in the bottom left hand corner there? it's my bestest, bestest stamp! so cute), then added some Shabby Chic Treasures (a bird, a birdhouse and a mushroom all lightly inked) and some prima flowers (Annalee Essentials 9 and Melody).
I finished off the birdhouse by placing it on some branches (from T!ms Autumn Gathering sizzix die) and some punched out and handcut leaves. Really pleased with the finished result even though it has got a pink background!
Also a big hello to Bridget - thank you for following me :)
Thanks for looking :)
Wednesday, 26 October 2011
WOYWW125
Well here I am for the fourth week running! not bad considering I was only able to play along once every few weeks earlier in the year! didn't visit many of you though last week as things kind of caught up with me.
Here is my desk as of this morning though:
half way through a layout there (couldnt resist these Pixie Glen papers even if they are a bit pink!) - I say half way as it looks finished but nothing apart from the photo is stuck down yet! The reversed tag there is from a quick tutorial I put together for my fortnightly challenge (on the post below if you are interested) and is nothing to do with the layout, other than that just the tools I am using and some stuff out that really should be tidied away but I am not sure where to put it! Just out of shot is some material I bought the other day in the hopes of sitting down for a sewing session and making a nice big pile of leaves to use with some of those fabulous Prima flowers I have, UTEE is also out as I now have a brand new melt pot thanks to Ranger replacing my broken one and just piles of stuff really.
If you would like to join in the fun over at Julias then pop over and upload a picture of your workspace so we can all come and have a good nosey!
Thanks for looking :)
Here is my desk as of this morning though:
half way through a layout there (couldnt resist these Pixie Glen papers even if they are a bit pink!) - I say half way as it looks finished but nothing apart from the photo is stuck down yet! The reversed tag there is from a quick tutorial I put together for my fortnightly challenge (on the post below if you are interested) and is nothing to do with the layout, other than that just the tools I am using and some stuff out that really should be tidied away but I am not sure where to put it! Just out of shot is some material I bought the other day in the hopes of sitting down for a sewing session and making a nice big pile of leaves to use with some of those fabulous Prima flowers I have, UTEE is also out as I now have a brand new melt pot thanks to Ranger replacing my broken one and just piles of stuff really.
If you would like to join in the fun over at Julias then pop over and upload a picture of your workspace so we can all come and have a good nosey!
Thanks for looking :)
Tuesday, 25 October 2011
Lets Think Creatively challenge no 8
It's Tuesday! so
Am really rather excited about this next challenge as it's all about housework! Yes honestly! The challenge this fortnight is to make either a tag/card and/or layout using your worst housework chore as inspiration! My worst chore is the dusting - what a waste of time that is, once you have dusted 2 hours later the dust pixies have been again and no-one can tell! my house is constantly dusty as I refuse to give in to the dust mites and refuse to dust everyday! so you can bet there will probably be lots of cobwebs on my challenge creations!
This challenge is not as difficult as it might sound - so here are some other ideas that you could use:
Worst chore ironing? then how about this trust old background technique:
Take your background paper (here I am using a tag) and crumple it up:
ink it, here I have used tea dye and vintage photo distress inks:
then get out the dreaded iron and iron it!
you now have a flat aged piece of cardstock to kick start off your fabulous creation!
Other ideas are:
Hate cleaning? try stamping with bleach
Hate Washing up? use a cloth or some string (am thinking of those string mop brushes here!)
Hate dusting? put some cobwebs or dust some perfect pearls onto your creation
Hate cooking? use a food theme or stamp with chocolate coloured ink
see the world is your oyster here - this challenge has already got my creative juices flowing - can't wait to start playing and er dusting! tee hee.
If you would like to join me on my journey to get creative whilst thinking about housework then please leave me a link here so I can come and have a look at your creations. The challenge is to make either a layout (let's), a tag (think), and/or a card (creatively) - you can make just one item or all three or even lots of each them if you so wish!
Thanks and have fun! :)
Am really rather excited about this next challenge as it's all about housework! Yes honestly! The challenge this fortnight is to make either a tag/card and/or layout using your worst housework chore as inspiration! My worst chore is the dusting - what a waste of time that is, once you have dusted 2 hours later the dust pixies have been again and no-one can tell! my house is constantly dusty as I refuse to give in to the dust mites and refuse to dust everyday! so you can bet there will probably be lots of cobwebs on my challenge creations!
This challenge is not as difficult as it might sound - so here are some other ideas that you could use:
Worst chore ironing? then how about this trust old background technique:
Take your background paper (here I am using a tag) and crumple it up:
ink it, here I have used tea dye and vintage photo distress inks:
then get out the dreaded iron and iron it!
you now have a flat aged piece of cardstock to kick start off your fabulous creation!
Other ideas are:
Hate cleaning? try stamping with bleach
Hate Washing up? use a cloth or some string (am thinking of those string mop brushes here!)
Hate dusting? put some cobwebs or dust some perfect pearls onto your creation
Hate cooking? use a food theme or stamp with chocolate coloured ink
see the world is your oyster here - this challenge has already got my creative juices flowing - can't wait to start playing and er dusting! tee hee.
If you would like to join me on my journey to get creative whilst thinking about housework then please leave me a link here so I can come and have a look at your creations. The challenge is to make either a layout (let's), a tag (think), and/or a card (creatively) - you can make just one item or all three or even lots of each them if you so wish!
Thanks and have fun! :)
Monday, 24 October 2011
Challenge Number 7 layout
Well again I was the only one who played along with my challenge this fortnight - but hey ho at least it got me creating stuff which is the main reason why I set these challenges!
Here is my layout, which I managed to do in under 2 hours yesterday!, which is why its quite plain for me - but it does have three different types of texture on so I am pleased with it:
Texture is on the T!m car embossing folder piece, the leaves on the palm tree are triple stamped - inked, cut out and mounted on top of each other and then the other texture is on the soda flavour labels for which I put coordinating paper through the dymo. Papers, diecuts and alphabet are Crate Paper - Static Collection, The palm tree is an Autumn Leaves Mindy's Zoo image, also used a compass mask and vintage photo and forest moss distress inks. Layout is based on an October 2011 page map. Can't believe I got it done so quickly yesterday - these photos have been in my "waiting to be scrapped" pile since May 2009!
Thanks for looking - and I will set a new challenge tomorrow.
Here is my layout, which I managed to do in under 2 hours yesterday!, which is why its quite plain for me - but it does have three different types of texture on so I am pleased with it:
Texture is on the T!m car embossing folder piece, the leaves on the palm tree are triple stamped - inked, cut out and mounted on top of each other and then the other texture is on the soda flavour labels for which I put coordinating paper through the dymo. Papers, diecuts and alphabet are Crate Paper - Static Collection, The palm tree is an Autumn Leaves Mindy's Zoo image, also used a compass mask and vintage photo and forest moss distress inks. Layout is based on an October 2011 page map. Can't believe I got it done so quickly yesterday - these photos have been in my "waiting to be scrapped" pile since May 2009!
Thanks for looking - and I will set a new challenge tomorrow.
Saturday, 22 October 2011
It's been a busy week again
Spent Wednesday morning at DS2's school watching the harvest festival then was out and about, Thursday involved a trip to the local farm with Year 2 (had 7 children to look after all day!) which was really good fun and my usual Friday of going for a swim at 8am, my art class then visiting my Mom, Dad and Nan in the afternoon - so I haven't had much time to craft as the evenings have involved another parents evening, disco (for my eldest - not me!) although yesterday his football wasn't on so we did actually get a Friday night in! whoo hoo.
So last night I managed to finish off these two projects (they have been on the go since I set the challenge 10 days ago!). The challenge is to use texture in some form on a tag, here's mine:
(isn't that Martha Stewart gravestone punch just the best!)
and also on a card:
haven't gotten around to doing a layout yet although I have done the layout for my next crop class - will post that another day. If you would like to join in with my challenge then the details are here - I would love to come and see what you come up with!
Yesterday was also rather fab as my brand new replacement melt pot turned up! had only emailed my address back to Ranger on Thursday too! It's out of the box but currently just sitting waiting on the dining room table as today we are moving the study into DS2's old bedroom and vice versa - bit of a nightmare!
A big thank you to Lou P for following me - it's nice to have you onboard!
Thanks for looking :)
So last night I managed to finish off these two projects (they have been on the go since I set the challenge 10 days ago!). The challenge is to use texture in some form on a tag, here's mine:
(isn't that Martha Stewart gravestone punch just the best!)
and also on a card:
haven't gotten around to doing a layout yet although I have done the layout for my next crop class - will post that another day. If you would like to join in with my challenge then the details are here - I would love to come and see what you come up with!
Yesterday was also rather fab as my brand new replacement melt pot turned up! had only emailed my address back to Ranger on Thursday too! It's out of the box but currently just sitting waiting on the dining room table as today we are moving the study into DS2's old bedroom and vice versa - bit of a nightmare!
A big thank you to Lou P for following me - it's nice to have you onboard!
Thanks for looking :)
Wednesday, 19 October 2011
WOYWW124
Well I am here for the third week running! only managed to look at about 60 desks last week but it was still all very inspiring!
Here is my desk this morning:
the makings of a card there and still the little pile of backgrounds I made last week waiting to made into something more fabulous! The tin at the back I found in Sainsburys last week and treated myself - its still full of the biscuits (which I dont want!) at the moment but will soon have something a lot more yummy in. The blue folder at the back is because I took myself off last week to join weight watchers (been trying to lose some weight for years!) and have already lost 3lbs - whoo hoo.
If you want to join in the fun at peeking at other desks around the world then pop over and visit Julias blog.
Thanks for looking and also a big thank you to Cindy - thanks for following me :)
Here is my desk this morning:
the makings of a card there and still the little pile of backgrounds I made last week waiting to made into something more fabulous! The tin at the back I found in Sainsburys last week and treated myself - its still full of the biscuits (which I dont want!) at the moment but will soon have something a lot more yummy in. The blue folder at the back is because I took myself off last week to join weight watchers (been trying to lose some weight for years!) and have already lost 3lbs - whoo hoo.
If you want to join in the fun at peeking at other desks around the world then pop over and visit Julias blog.
Thanks for looking and also a big thank you to Cindy - thanks for following me :)
Wednesday, 12 October 2011
WOYWW123
I didn't word my post last week very well as some of you thought my mojo was visiting somewhere else whereas in reality it was with me - however, as usually happens!, I was really busy with other bits and pieces so didn't get to use most of it and then yesterday when I had a free afternoon (whoo hoo!) I found I had lost all my ideas! Oh well I sat and put these pieces of cardstock through the big shot to put texture on them (my challenge for this fortnight is to make a tag, card and/or layout with some texture) so I prepared these in readiness. A few will be for Halloween which we don't really celebrate in our house but I so love making spooky things and then I have finally started on the Christmas things - 74 sleeps left!
So here is my desk this morning:
If you want to join in the fun of looking at other desks around the world then pop over to Julias.
Thanks for looking :)
So here is my desk this morning:
If you want to join in the fun of looking at other desks around the world then pop over to Julias.
Thanks for looking :)
Tuesday, 11 October 2011
Lets Think Creatively challenge no 7
It's Tuesday! so
Can't believe I had no takers for my challenge during the last fortnight - where have you all gone? Anyway this fortnight to get our creative juices flowing the challenge is to use texture on your pieces - by texture I mean by using embossing folders, texture plates and such like. Here are photos of all mine:
Texture plates and Tim embossing folders
Cuttlebug and other embossing folders
smaller sizzix and cuttlebug folders
Now I am not bragging here - I know I have a lot of these however they have all been accumulated over the years as I love texture backgrounds on my artwork however these have kind of been neglected of late and hardly used at all therefore over the next two weeks my challenge is to fall back in love with them and start using them.
Luckily I have some new stash to help me:
whoo hoo pretty neat eh! have coloured those mushrooms with inka gold red paint - as you can see I haven't used any of the goodies yet - shame really as my mojo seemed to be visiting last week but I was busy with other things - not least this little munchkins 7th Birthday celebrations:
here he is with his big present and his homemade bunting! And now I have an afternoon with the house to myself today I can't seem to get motivated to start crafting - so enough of my waffling texture/embossing folders here I come!!
My challenge is to make either a tag, card or layout using a texture technique on them (you can make just one item or all three or even lots of each them if you so wish!) If you would like to join me on my journey to rediscover texture then please leave me a link here so I can come and have a look at your creations:
Thanks :) and also a big hello to Sarah - thanks for following me :)
Can't believe I had no takers for my challenge during the last fortnight - where have you all gone? Anyway this fortnight to get our creative juices flowing the challenge is to use texture on your pieces - by texture I mean by using embossing folders, texture plates and such like. Here are photos of all mine:
Texture plates and Tim embossing folders
Cuttlebug and other embossing folders
smaller sizzix and cuttlebug folders
Now I am not bragging here - I know I have a lot of these however they have all been accumulated over the years as I love texture backgrounds on my artwork however these have kind of been neglected of late and hardly used at all therefore over the next two weeks my challenge is to fall back in love with them and start using them.
Luckily I have some new stash to help me:
whoo hoo pretty neat eh! have coloured those mushrooms with inka gold red paint - as you can see I haven't used any of the goodies yet - shame really as my mojo seemed to be visiting last week but I was busy with other things - not least this little munchkins 7th Birthday celebrations:
here he is with his big present and his homemade bunting! And now I have an afternoon with the house to myself today I can't seem to get motivated to start crafting - so enough of my waffling texture/embossing folders here I come!!
My challenge is to make either a tag, card or layout using a texture technique on them (you can make just one item or all three or even lots of each them if you so wish!) If you would like to join me on my journey to rediscover texture then please leave me a link here so I can come and have a look at your creations:
Thanks :) and also a big hello to Sarah - thanks for following me :)
Wednesday, 5 October 2011
WOYWW 122
Here I am again - two weeks running so I am really pleased - looking forward to some desk inspiration as my mojo is visiting again at the moment!
This is my desk actually this morning (I usually take a photo on Tuesday in the light) and I am surprised just how dark it is this morning at 6.48 - surely it was lighter than this yesterday??? anyway:
Tag is left there from my tutorial that I put together yesterday (blog post below if you are interested in joining in with my challenge) - pile of stamps in the middle of the table, Horace the owl (on another post), a ball of string as DS2 has made a bunting to hang on the wall for his birthday - bless him - the A4 notepad on the other side of the table is my things to do list - its over that side as thats the side that I put the laptop, just an everyday dining table of clutter really - need to tidy it all up by Sunday as thats when DS2's party is as he is 7 on the 10th.
Thanks for looking and if you want to join in with the fun pop over to Julias for a weekly desk hop of fun.
Thanks for looking :)
This is my desk actually this morning (I usually take a photo on Tuesday in the light) and I am surprised just how dark it is this morning at 6.48 - surely it was lighter than this yesterday??? anyway:
Tag is left there from my tutorial that I put together yesterday (blog post below if you are interested in joining in with my challenge) - pile of stamps in the middle of the table, Horace the owl (on another post), a ball of string as DS2 has made a bunting to hang on the wall for his birthday - bless him - the A4 notepad on the other side of the table is my things to do list - its over that side as thats the side that I put the laptop, just an everyday dining table of clutter really - need to tidy it all up by Sunday as thats when DS2's party is as he is 7 on the 10th.
Thanks for looking and if you want to join in with the fun pop over to Julias for a weekly desk hop of fun.
Thanks for looking :)
Tuesday, 4 October 2011
Lets Think Creatively challenge no 6
This challenge No. 6 has still got a week to run but so far I haven't had any one join in :(. So I thought I would put together a quick tutorial on how to make a tag, this one:
took me less than half an hour although I have to confess the calico ribbon was predyed (leftovers from my owls legs!) and the crackle paint on the butterfly isn't quite dry just yet!
So you start off with your tag, card or layout base that you want your feature on and the shape you want to use as a mask:
Photocopier paper is ideal for this mask as anything too thinner and the inks will bleed through it and anything much thicker won't let you stamp right up to the image but will leave an extra space around it where the stamp can't quite reach the tag - this is also fine but you might end up with a mask slightly larger than you anticipated.
Next affix the mask down lightly on the tag - I use a tiny piece of double sided tape in the centre or a flat blob of blu tack if there is any close to hand (there isn't usually though - my children have a thing for sticking up posters everywhere!) and then stamp around the edge with a selection of stamps in a variety of colours, here I used Crafty Individuals flowers with distress inks:
Stamp completely around the mask to get the full effect, with some images overlapping onto the mask and some directly on the tag itself (in this case the two red butterflies):
then remove the mask:
now you have a beautiful image and all you need to do is finish decorating the tag, so add some colour around the edges and add further stamped images if necessary, then place a slightly smaller shape in the centre of the masked outline. Here I used a circle cut from calico with a simple quote and inked edges:
then add some embellishments to give your creation a wow factor:
and as I said earlier this whole tag took me less than 30 minutes. This technique is ideal if you have a batch of Christmas cards or similar to make where you can make a whole bunch in hardly any time at all.
Here is one of my finished cards using this technique too:
not sure if it's a bit too yellow for my sister in law though (had to do that due to a big finger print on the outer white (why does that always happen???)) so it might get redone tonight! I kept all the embellishments plain and simple as I thought we would be posting the card but she is now coming to my son's party on Sunday (even though it is actually her birthday) so I can have another play if necessary - we shall see.
Thanks for looking and if this tutorial has inspired you to have a go please join in with my challenge and link up so I can come and see your creation.
took me less than half an hour although I have to confess the calico ribbon was predyed (leftovers from my owls legs!) and the crackle paint on the butterfly isn't quite dry just yet!
So you start off with your tag, card or layout base that you want your feature on and the shape you want to use as a mask:
Photocopier paper is ideal for this mask as anything too thinner and the inks will bleed through it and anything much thicker won't let you stamp right up to the image but will leave an extra space around it where the stamp can't quite reach the tag - this is also fine but you might end up with a mask slightly larger than you anticipated.
Next affix the mask down lightly on the tag - I use a tiny piece of double sided tape in the centre or a flat blob of blu tack if there is any close to hand (there isn't usually though - my children have a thing for sticking up posters everywhere!) and then stamp around the edge with a selection of stamps in a variety of colours, here I used Crafty Individuals flowers with distress inks:
Stamp completely around the mask to get the full effect, with some images overlapping onto the mask and some directly on the tag itself (in this case the two red butterflies):
then remove the mask:
now you have a beautiful image and all you need to do is finish decorating the tag, so add some colour around the edges and add further stamped images if necessary, then place a slightly smaller shape in the centre of the masked outline. Here I used a circle cut from calico with a simple quote and inked edges:
then add some embellishments to give your creation a wow factor:
and as I said earlier this whole tag took me less than 30 minutes. This technique is ideal if you have a batch of Christmas cards or similar to make where you can make a whole bunch in hardly any time at all.
Here is one of my finished cards using this technique too:
not sure if it's a bit too yellow for my sister in law though (had to do that due to a big finger print on the outer white (why does that always happen???)) so it might get redone tonight! I kept all the embellishments plain and simple as I thought we would be posting the card but she is now coming to my son's party on Sunday (even though it is actually her birthday) so I can have another play if necessary - we shall see.
Thanks for looking and if this tutorial has inspired you to have a go please join in with my challenge and link up so I can come and see your creation.
Monday, 3 October 2011
All sewn up
Just a flying visiting from me today as I need to tidy up before the school run, so firstly a big thank you to CraftyWomble and Marjo for following me - welcome to my little world!
So did I spend the weekend outside making the most of the fabulous weather we have been having? Nah of course I didn't instead I finished this:
His name is Horace - isn't he adorable, and here is a view of his beautiful tail too:
Pattern was taken from a book called "The Artful Bird" by Abigail Glassenberg and the materials used were plain canvas and a charm pack I had lying around.
Thanks for looking :)
So did I spend the weekend outside making the most of the fabulous weather we have been having? Nah of course I didn't instead I finished this:
His name is Horace - isn't he adorable, and here is a view of his beautiful tail too:
Pattern was taken from a book called "The Artful Bird" by Abigail Glassenberg and the materials used were plain canvas and a charm pack I had lying around.
Thanks for looking :)
Subscribe to:
Posts (Atom)